In my previous post, we delved into the details of setting up a Redis Cluster, exploring the fundamentals of its architecture and configuration. Building upon that foundation, this post will guide you through the process of migrating data from a standalone Redis instance to a shared Redis Cluster, achieving a distributed and fault-tolerant data storage solution.
Setting the Stage: Standalone Redis Instance
Assuming you’ve already set up a standalone Redis instance, the journey to a Redis Cluster begins with the creation of multiple Redis instances to form the cluster. Our ultimate goal is to establish a six-node Redis Cluster comprising three master nodes and three replica nodes.
Step 1: Redis Cluster Initialization
To kick things off, start six Redis instances on ports 7000, 7001, 7002, 7003, 7004, and 7005. For simplicity, we’ll focus on the initial three instances: 7000, 7001, and 7002. The cluster formation will start without any replicas.
Please read the previous article about cluster creation.
redis.conf file.
port 7000
cluster-enabled yes
cluster-config-file nodes.conf
cluster-node-timeout 5000
bind 0.0.0.0
requirepass "123"
masterauth "123"
protected-mode "yes"
logfile /var/log/redis_7000.log
pidfile /var/run/redis_7000.pid
dir ./
save 900 1
save 300 10
save 60 10000
dbfilename dump.rdb

Step 2: Cluster Configuration
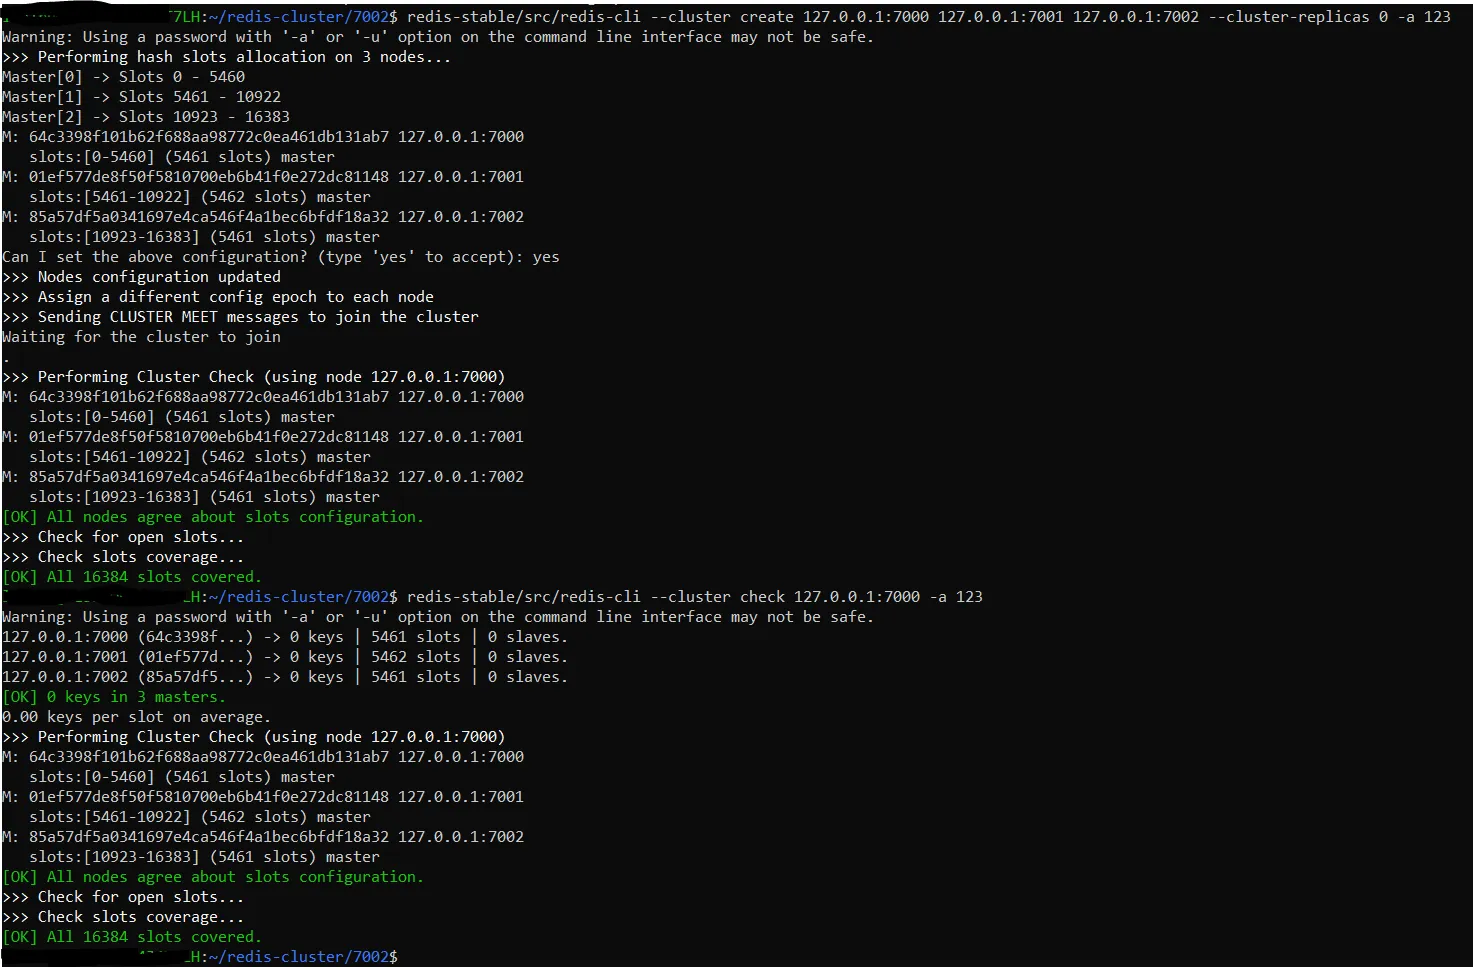
Execute the cluster creation using the following command:
redis-cli --cluster create <host:port> ... --cluster-replicas 0
This creates the cluster using instances on ports 7000, 7001, and 7002, with no replicas initially.
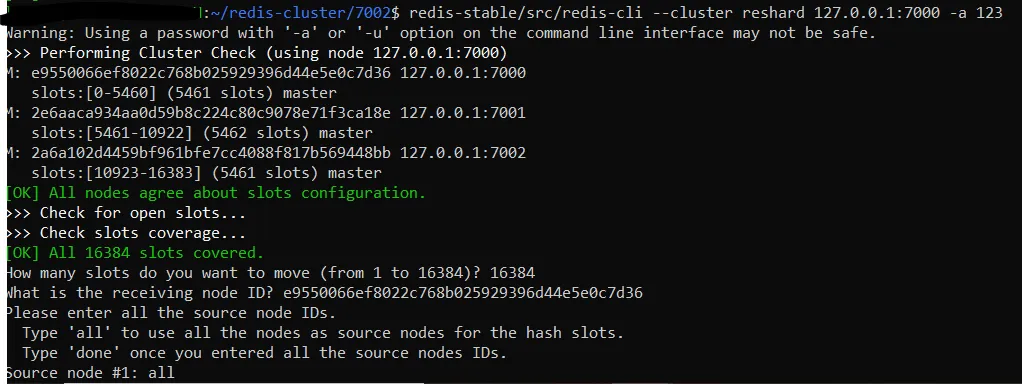
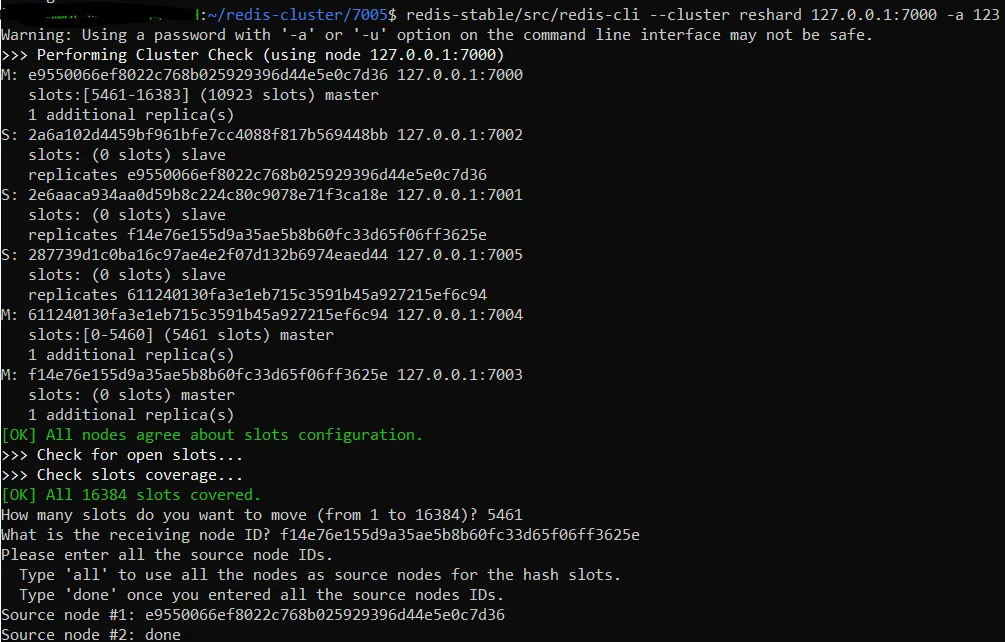
Step 3: Reshard the Cluster
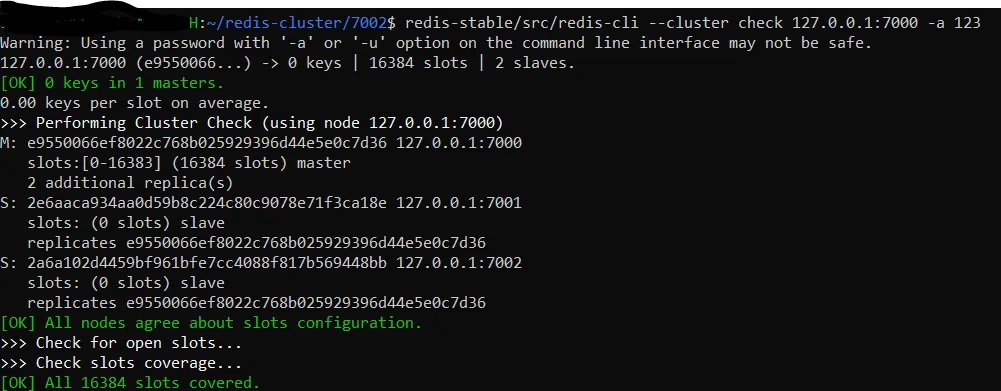
Run the cluster check command to visualize the distribution of hash slots among the three instances. To consolidate all hash slots into one instance (e.g., 7000), use the cluster reshard command. (Run again if reshard operation failed)
Step 4: Migrating Data
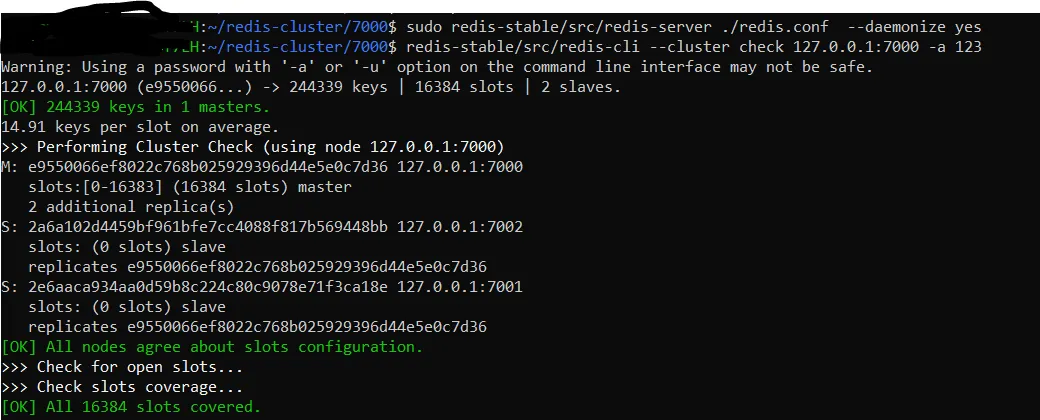
After completing the reshard, shut down the master node (7000) with the shutdown nosave command. Extract the latest AOF (Append-Only File) from the existing standalone Redis instance and copy it to the Redis Cluster master node’s folder (7000). Restart the master node.
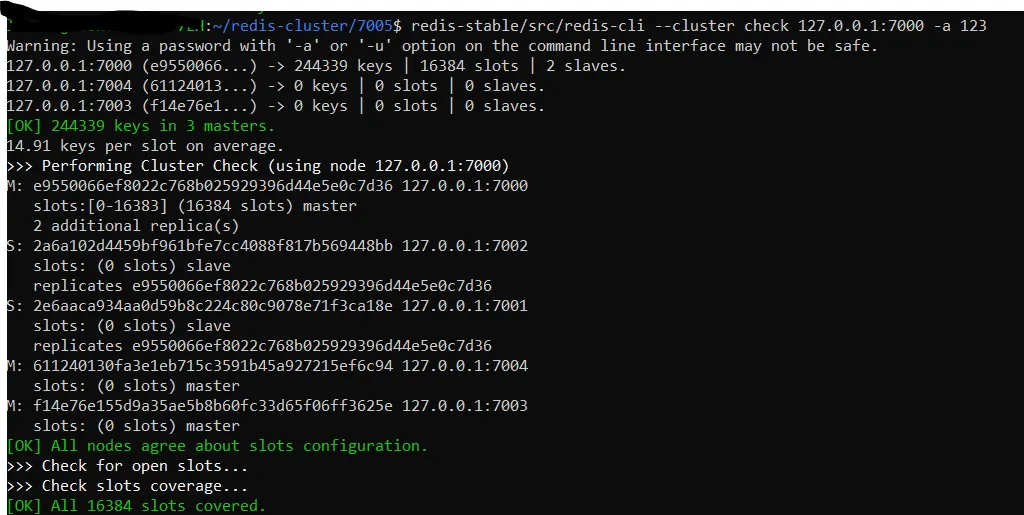
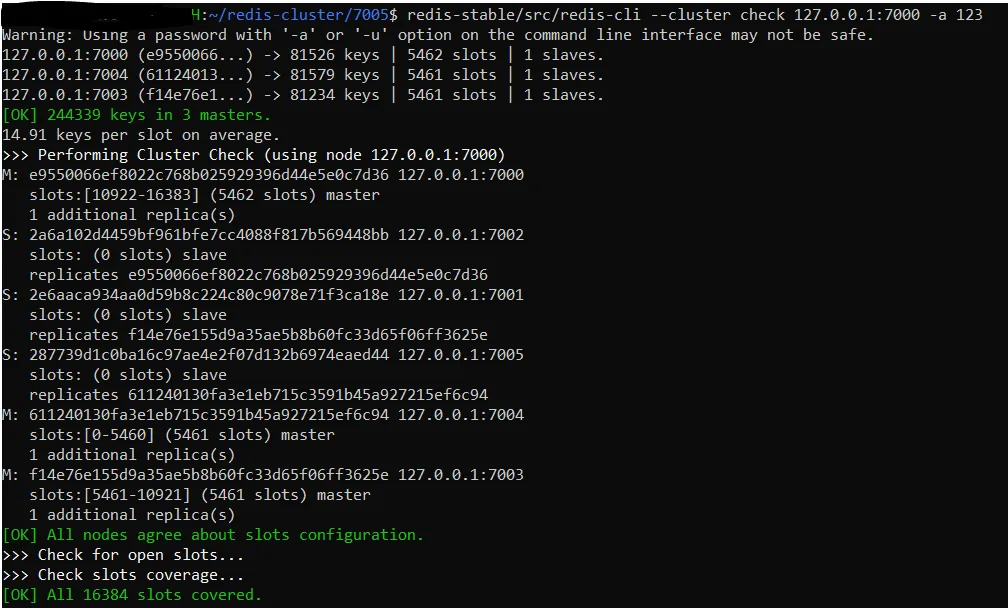
Running cluster check now displays the total key count on the master node.
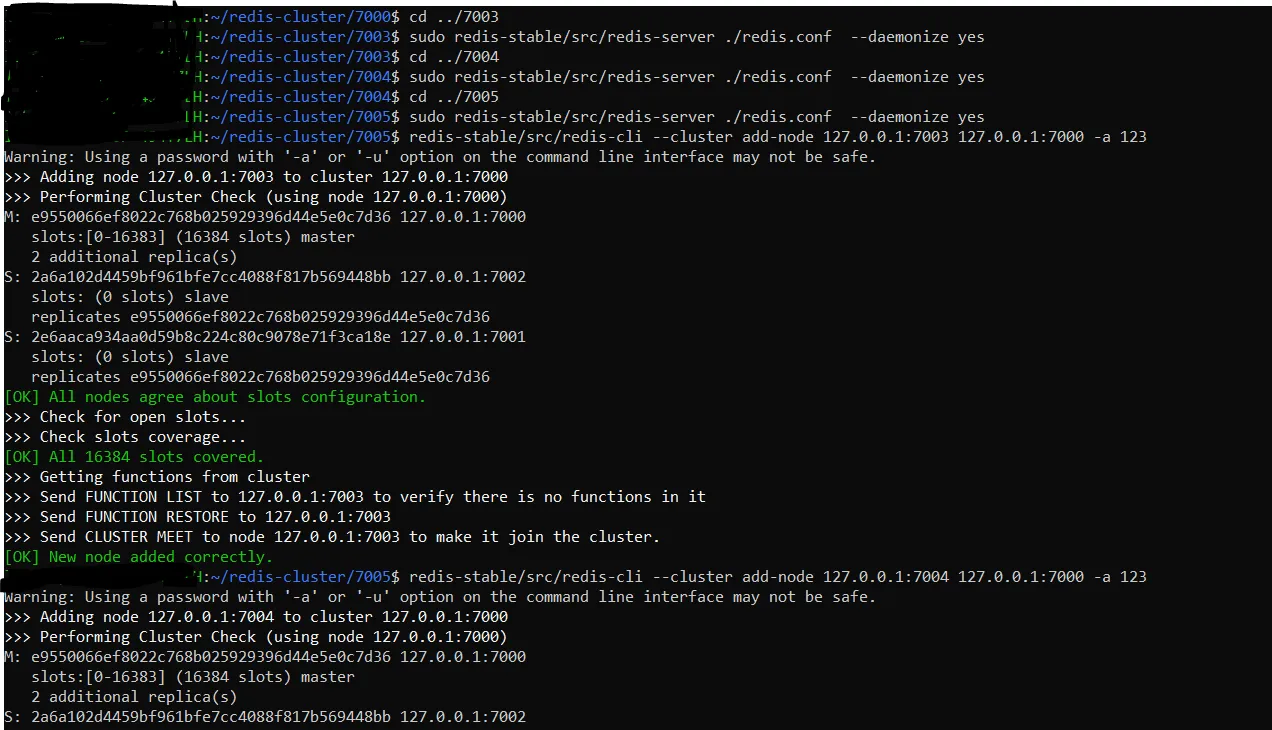
Step 5: Adding Nodes
Add two more Redis instances (7003 and 7004) as master nodes using the cluster add command. These instances won’t have any slots allocated initially.
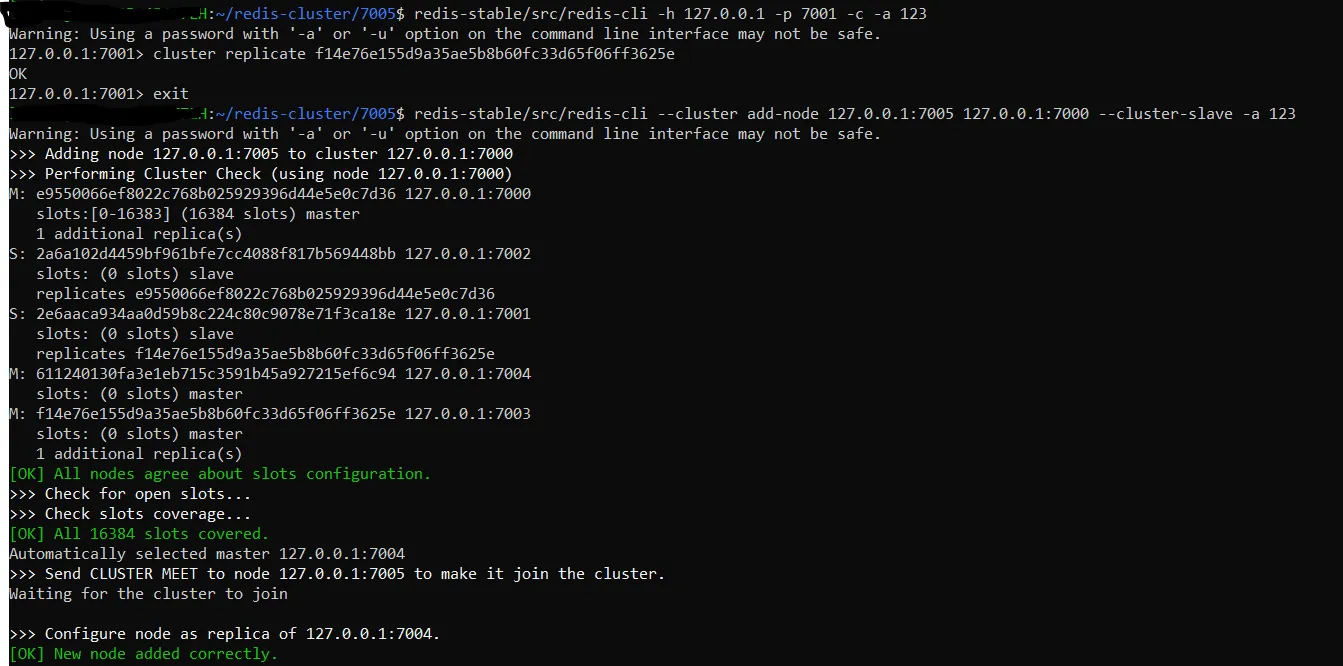
Log into a replica node and set it as a replica of the 7003 master node. Now, you have 7000 as a master with one replica, 7003 as a master with another replica, and 7004 as a master without any replica.
Step 6: Completing the Cluster
Integrate the 7005 instance as a slave node, and it will automatically recognize its master as 7004. Initiate the reshard process to allocate slots to the 7003 and 7004 master nodes.
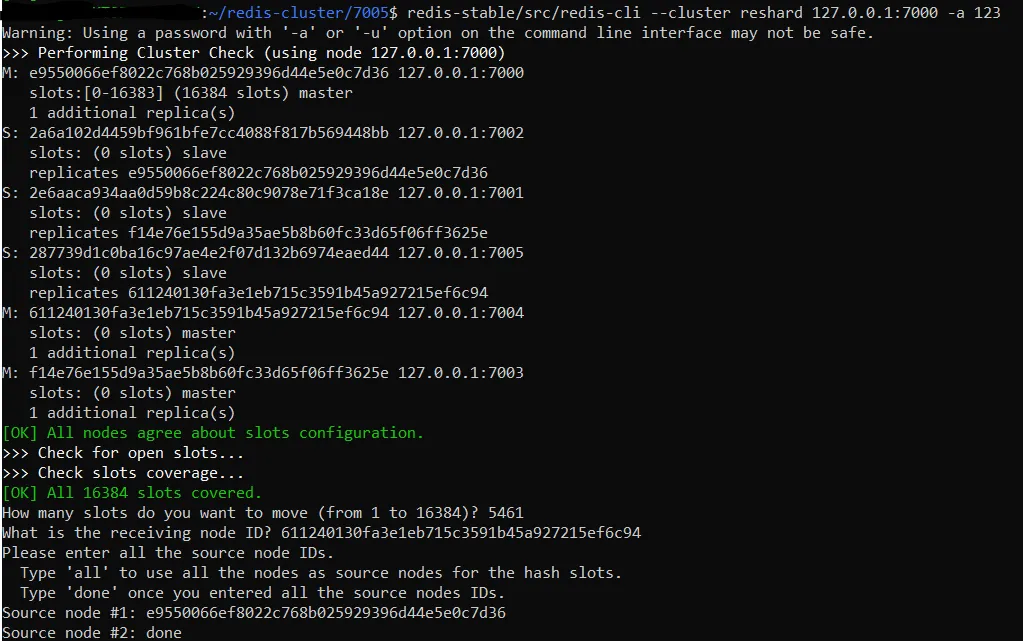
After completion, execute the cluster check command to confirm the distribution of keys among all master Redis nodes.
Conclusion
Congratulations, you’ve successfully migrated data from a standalone Redis instance to a robust six-node Redis Cluster! This orchestrated process ensures data integrity, fault tolerance, and efficient distribution across the cluster. Redis Cluster not only provides high availability but also scales seamlessly, making it a powerful solution for data-intensive applications.